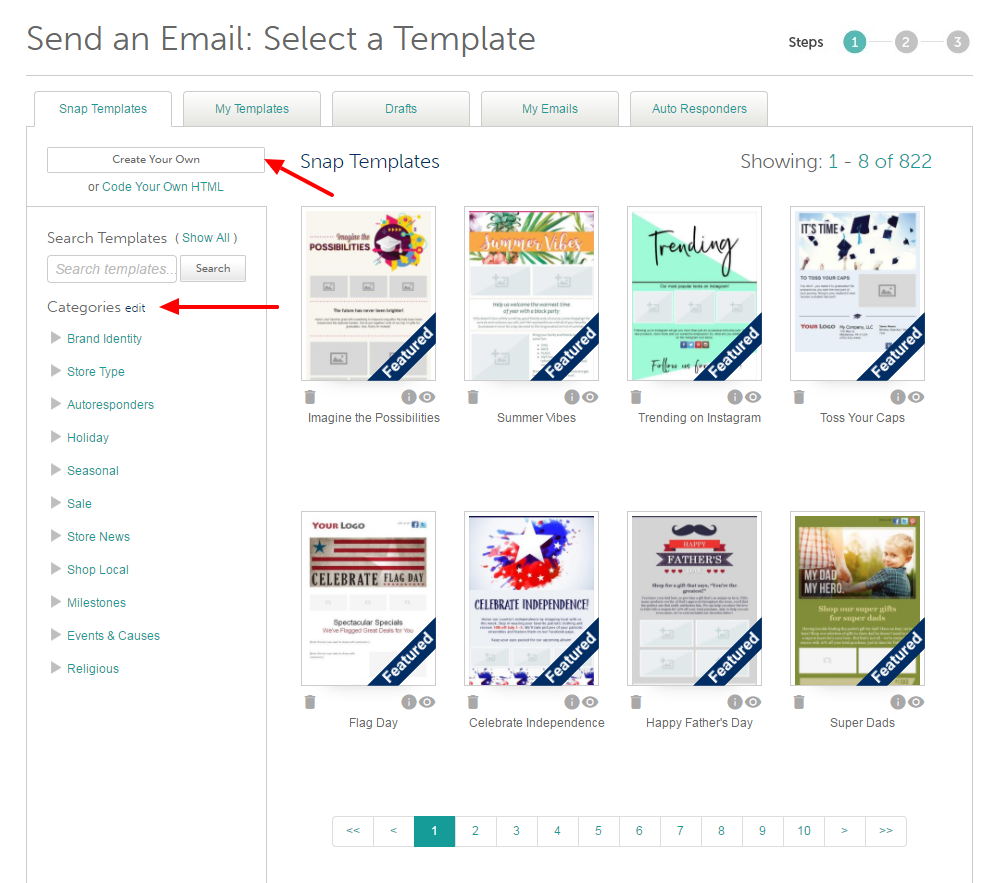
1. Templates & Create Your Own
Click on Email on the top navigation bar. Start your email by choosing a template from the SnapRetail Template Library. You can check out our featured templates, browse through the categories listed on the left side, use the search feature, or click Create Your Own to start with a basic blank editor.
- Drag and Drop
All boxes listed on the left-hand side are called Content Widgets. These are categorized by Customizable and Business. The Business widgets are pre-populated with information from your Account Settings and cannot be edited in the editor.
Drag and Drop any widget onto the email template on the right to build your email. Look for the GREEN LINE before releasing. The Green Line will show you where you are placing the widget. A Horizontal Green Line means the widget will take up an entire row. A Vertical Green Line means that the widget will be placed next to another widget in a row. You can fit up to 4 widgets in any row.
Example of where you will see the Green Lines:
When placing a new widget on the template, aim for the far left or far right of a widget to see the green line. You can also aim for above or below a widget, or between two widgets.
Note: If you are working from a Create Your Own Template, you will not see a Green Line when it is the first widget in a section. The section will say “Drag and Drop a content widget from the left over to this side to get your content design started”. This section will be shaded gray when you can drop.
- Flexible Content
All the content in the templates is flexible. This means you can change the text to fit your needs, move widgets around, add or delete widgets, and more! Just click on the widget on the template you want to edit. All editing happens on the left sidebar.
Example of Editing Text:
Example of Deleting and Adding Widgets:
Click on the widget you want to delete. You can either click the red Delete button on the left sidebar or drag the widget to the top of the editor to the trash can. If you want to add content to your template, just drag another widget onto the template.
Example of Moving Widgets on the Template:
If you don’t like your layout, change it at any time by dragging and dropping the widgets around on the template. This can be done at any time.
- Editing Images:
The images that you use sometimes will be different sizes and orientations. Each row can only be as tall as the tallest image.
Use the Container Height to adjust the height of the row. You can use the slider, arrows, or type in the height you need.
If white space remains in an image widget with a smaller image, click the Edit Image button. You can then Fit the image by Width, Height, or Both, Zoom in or out, Angle the image, or Manually Move the image around, in order to fill the yellow container.
Here, you can also view Advanced Editing Options to also filter images, overlay text, change orientation, and more.
- Change Background
Change the background page colors using the tools in the upper right of the editor.
The first drop down menu shows which sections you are choosing to color. The options include All (including border), All Sections (Header, Body, Footer), Header, Sidebar, Body, Footer. The second drop down menu allows you to choose your color.
If you would like to color the border only, first choose the ALL section, choose your color, then choose the All Sections option, then choose white or another color to fill in everything but the border.
- My Widgets
Save time by creating custom widgets for text, image, and coupon, and save them for later use. Use My Widgets for things like a second location, alternative logos, coupons offered regularly, or to save an image from a template and more!
Creating and Saving My Widgets:
First Add your widget type and format your content how you would like it to save. Then click “My Widgets” at the top right of the sidebar then "Save Widget". You will see the content you’re saving appear in a popup. Here you can name each saved widget to keep organized. You can safely close this popup.
Example of Creating and Saving My Widgets:
Using Saved “My Widgets”
Drag and Drop the type of content widget you would like to add. Click “My Widgets” on the top right corner of the sidebar. Click “Load Widget”. Choose the content that you would like to place on your template.
Example of Using Saved “My Widgets”:
0 Comments