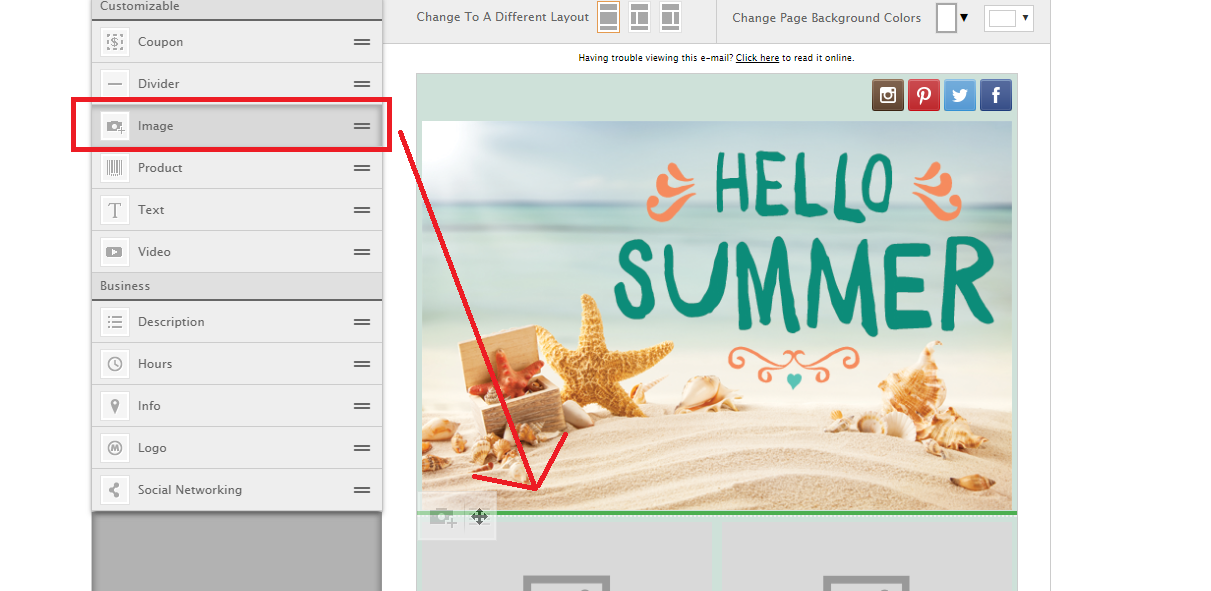
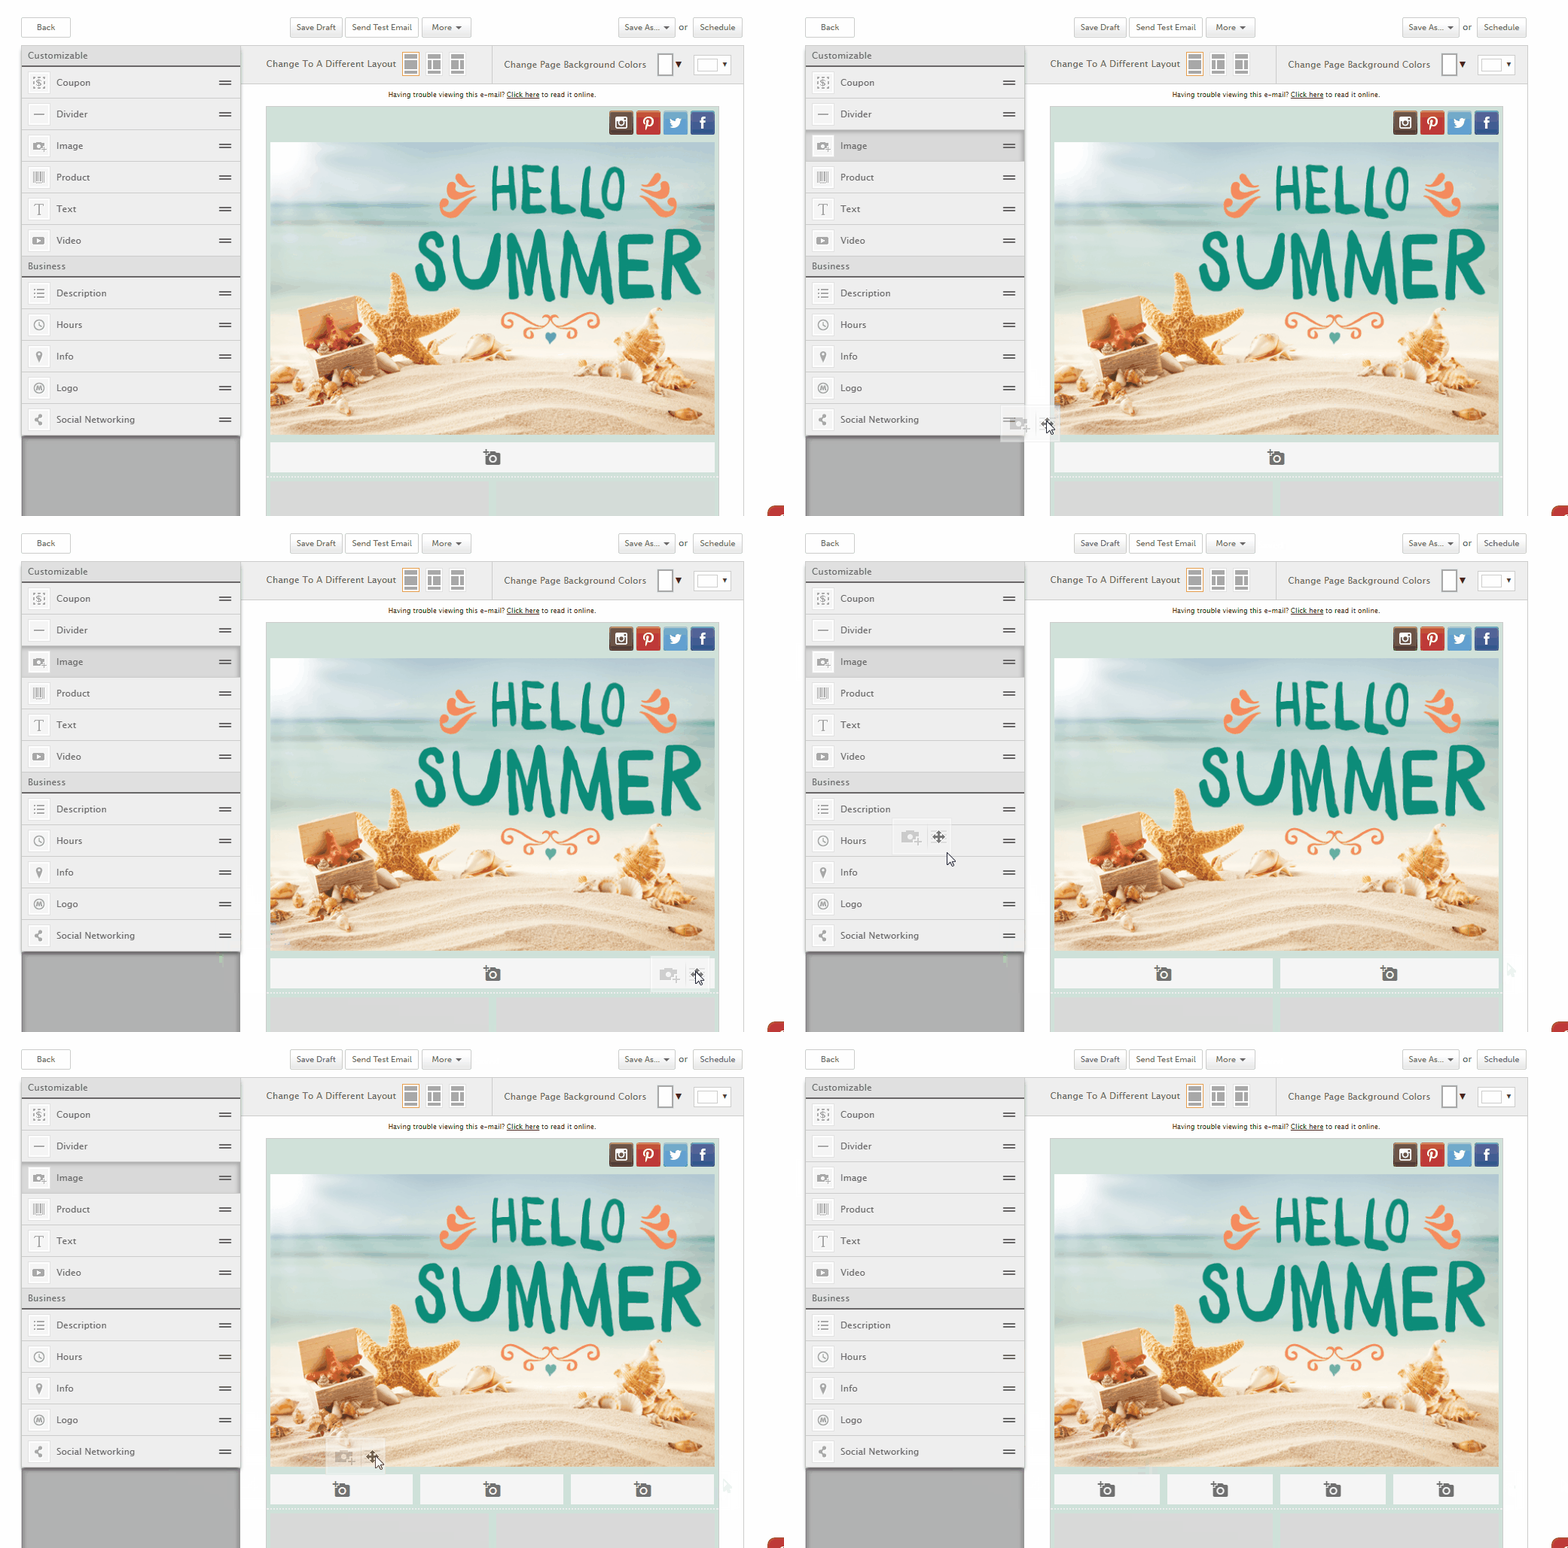
- To add an image to an email template click on an existing image widget or add additional images by dragging and dropping an Image widget from the left into the template.
- Drag and drop the image widget into the template until you see a green line appear. An image widget can be placed above, below, or beside any other widget.

- If you are placing images side-by-side be sure to drag and drop the new image to the FAR left or FAR right of the other image until you see a green line appear.

- Click on the empty widget , then click Select Image at the top of the editor. From here you have a few options:
- Stock Images – Select from our library of thousands of stock images and graphics.
- Search Stock Images by typing your search query in the search box and hitting enter or clicking the magnifying glass. Clear your search by clicking Clear.
- Filter Stock Images by choosing Type, Category or Subcategory from the drop-down boxes below the search box.
- Browse Stock Images from the page numbers and arrow icons at the top right.
- Once you’ve found the image you wish to use, click Select.
- Vendor Images - SnapRetail users that are partnered Drive Retail or have access to SnapRx will see a vendor images tab where they can access vertical-specific content.
- My Images – Select from images that you’ve already uploaded to your SnapRetail account. Images that you’ve taken with the SnapRetail photo app or saved using the SnapIt tool will appear here.
- Search My Images by typing your search query in the search box and hitting enter or clicking the magnifying glass. Clear your search by clicking Clear.
- Browse My Images from the page numbers and arrow icons at the top right.
- Once you’ve found the image you wish to use, click Select.
Upload Your Own – Upload images from your computer.
- Drag your image file(s) into the dotted box to begin uploading or select Choose File(s).
- Your image(s) will begin to upload to your image library.
- To add more images, click Upload More.
- Once the upload has finished, Select the image you wish to add to your email.
- All additional images will be saved in the My Images tab. There is no limit on the amount of images you can save to your SnapRetail account.
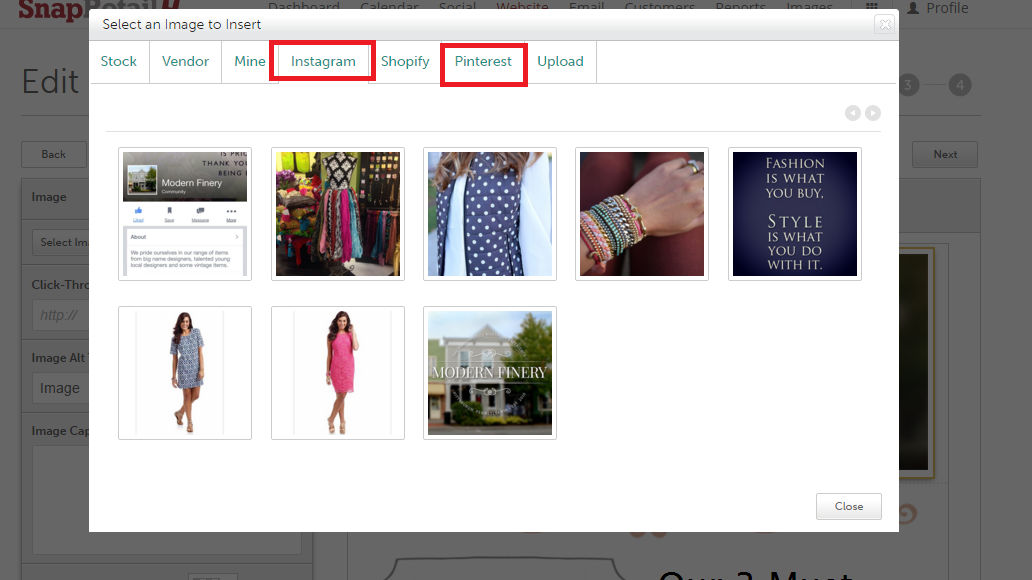
Instagram and/or Pinterest images – Choose an image that you’ve posted to your store’s Instagram or Pinterest account.
- Browse Instagram or Pinterest images from the page numbers and arrow icons at the top right.
- Once you’ve found the image you wish to use, click Select.
Important Note: You can only access Instagram and/or Pinterest images if your Instagram account or Pinterest account is connected to SnapRetail in the My Account section of your SnapRetail account. The My Account section is found by clicking on the icon at the top right hand corner (silhouette of a person) and then click Account, then scroll down to the Email & Social Media accounts section. If your Instagram and Pinterest accounts are not connected you will not see the tabs.
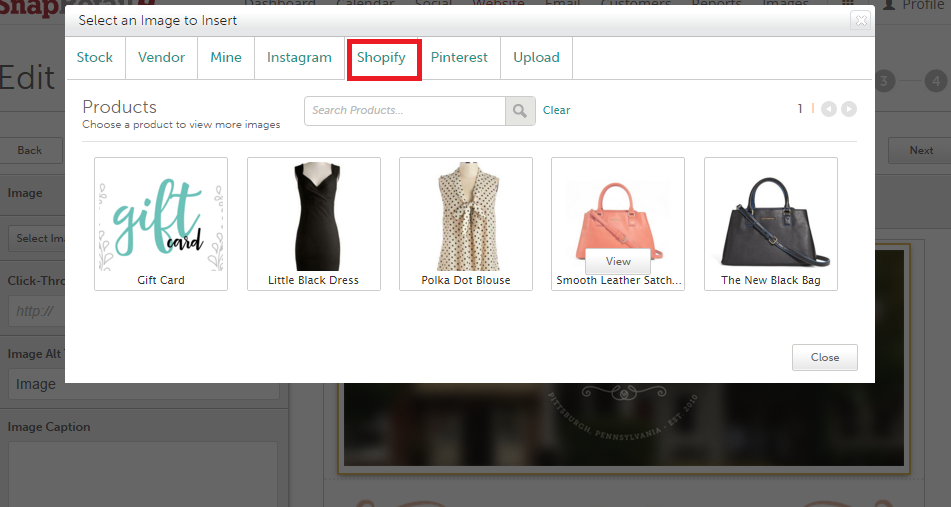
Shopify images – Choose an image that you’ve uploaded in your Shopify account.
- Browse Shopify images from the page numbers and arrow icons at the top right.
- Once you’ve found the image you wish to use, click Select.
Important Note: You can only access Shopify images if your Shopify account is connected to SnapRetail in the My Account section of your SnapRetail account. The My Account section is found by clicking on the icon at the top right hand corner (silhouette of a person) and then click Account, then scroll down to the E-Commerce section. If your account is not connected you will not see the Shopify tab.
If the image is cut off in your email this can be fixed using the Container Height slider bar. Please see this article for more information
You can also add a click-through link to the image to take the viewer to a website, add an image caption, use the Edit Image feature to manipulate the image in a variety of ways, make the image pinnable, and adjust the padding surrounding the image.


2 Comments